

Introduction
Flooring can make or break the entire look and feel of your home. It’s one of the most noticeable—and expensive—renovations homeowners tackle. But here’s the kicker: flooring installation mistakes are surprisingly common, and they can turn a dream project into a total disaster. 😰
According to the National Wood Flooring Association, improper installation is one of the top reasons for flooring failure. Whether you’re taking the DIY route or working with a professional, knowing what not to do can save you from warped boards, creaky seams, or costly repairs down the road.
In this post, we’ll break down the top flooring installation mistakes homeowners make—and show you exactly how to avoid them. Let’s help you get it right the first time!
The Installation Challenges of Various Flooring
Different types of flooring come with their own installation hurdles. Understanding these challenges can help homeowners and contractors plan better and avoid costly mistakes. Here’s a breakdown of flooring installation mistakes by their types:
Hardwood Flooring
- Requires acclimation to room temperature and humidity before installation.
- Highly sensitive to moisture—can expand or contract, leading to gaps or buckling.
- Needs a perfectly level and dry subfloor.
- Installation methods (nail-down, glue-down, or floating) vary depending on the product.
Laminate Flooring
- Click-lock systems can be tricky; improper locking leads to gaps or raised edges.
- Floating floors must have proper expansion gaps or they’ll buckle.
- Subfloor must be clean and level to avoid uneven surfaces.
Vinyl Plank (LVP/LVT)
- Subfloor imperfections will telegraph through the planks.
- Sensitive to temperature changes, which can cause expansion or contraction.
- Adhesive options require correct selection and curing time for glue-down types.
Tile Flooring
- Demands a solid, level base—often a cement backer board.
- Poor mortar or grout work can result in uneven tiles or cracking.
- Tile cutting can be challenging without proper tools and experience.
Carpet Flooring
- Requires professional stretching to avoid wrinkles and bubbles.
- Seams must be planned carefully for visual consistency and durability.
- Padding selection affects both comfort and longevity.
Engineered Wood
- May be installed using multiple methods, leading to confusion for DIYers.
- Floating versions can produce hollow sounds if underlayment is inadequate.
- Moisture and temperature fluctuations can still affect the stability.
Bamboo Flooring
- Prone to expansion and contraction due to its natural moisture sensitivity.
- Its hardness can make it difficult to cut and install.
- Often needs specific humidity control indoors to prevent gaps or swelling.
Common Flooring Installation Mistakes Homeowners Make
Here are the 10 most common flooring installation mistakes:
Common Pre-Installation Oversights
1. Skipping Subfloor Preparation
A crucial step in ensuring a smooth flooring installation is preparing the subfloor correctly. If you’re unsure about how to select the right subfloor material or whether it requires specific treatment, learn how to choose the right flooring installation to ensure the best foundation for your new floor.
- Uneven Surfaces: Humps or dips in the subfloor can cause tiles to crack or floating floors to shift, creating eyesores and even tripping hazards.
- Moisture Issues: Damp subfloors—especially in basements or bathrooms—can lead to mold growth, warping, and eventual structural damage.
- Best Practices: Inspect the subfloor for flatness using a straight edge. Use leveling compounds for dips and sand down high spots.
- Moisture Barriers: In high-moisture areas, install a proper vapor barrier to prevent water from seeping into the flooring layers.
2. Not Letting Flooring Acclimate
Flooring materials, especially wood-based ones, respond to their environment. If not given time to adjust, they might shift after installation.
- Why It Matters: Changes in temperature or humidity can cause hardwood and laminate planks to expand or contract.
- Common Consequences: Gapping, buckling, or squeaky floors that need costly repairs.
- What to Do: Place the unopened flooring boxes in the room for 48–72 hours before installation. Make sure the room is climate-controlled and that the flooring is stored flat.
To understand the benefits of proper acclimation and the best practices, take a look at what you can expect during professional flooring installation with this detailed guide on professional flooring services.
3. Choosing the Wrong Flooring for the Room
Not all flooring is created equal, and using the wrong type for certain areas can cause premature wear or complete failure.
- Moisture-Prone Areas: Avoid hardwood in bathrooms, laundry rooms, or below-grade basements—it will absorb moisture and warp.
- High-Traffic Spaces: Opt for durable, scratch-resistant options like luxury vinyl plank (LVP), tile, or engineered hardwood in busy areas.
- Family & Pet-Friendly Floors: Choose flooring with high durability ratings and easy maintenance for homes with kids or pets.
Note: Selecting the appropriate flooring for different spaces in your home is essential. If you’re stuck between options like carpet or vinyl, discover the difference between carpet vs vinyl flooring to make an informed decision that fits your room’s needs. Additionally, you may want to explore the types of carpet flooring to find out which suits your preferences best.
Why Proper Preparation Matters
- Ensures the structural integrity of your flooring.
- Prevents costly future repairs or premature replacements.
- Enhances comfort, safety, and longevity.
- Upholds manufacturer warranties that could be voided by prep errors.
Critical Mistakes During Installation
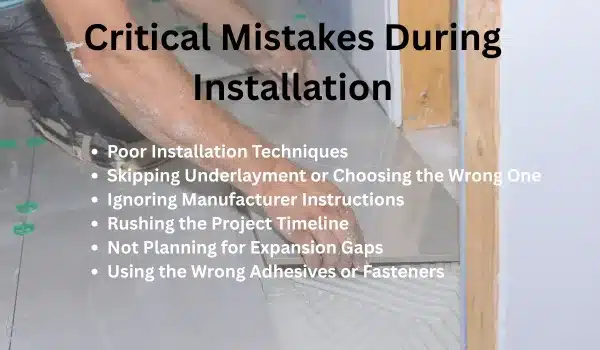
1. Poor Installation Techniques
Even premium flooring can look awful if installed improperly. DIY or amateur installations often lead to costly rework.
- Common Mistakes: Misaligned seams, inconsistent grout lines, or uneven planks.
- Tool Misuse: Not using tapping blocks, spacers, or appropriate saws can ruin materials and precision.
- Professional Tip: Always check installer credentials, past work, and reviews before hiring. Even pros should follow the brand’s guidelines.
2. Skipping Underlayment or Choosing the Wrong One
Underlayment is a hidden hero that contributes to your floor’s feel, sound, and lifespan.
- Purpose: It cushions impact, reduces noise, and protects against moisture.
- Wrong Choices Can Hurt: The wrong underlayment can cause mold, reduce insulation, or even void warranties.
- Types of Underlayment:
- Foam: Basic cushioning, budget-friendly.
- Cork: Eco-friendly, soundproofing.
- Rubber: Great for moisture-prone areas.
- Check Manufacturer Guidelines: Match underlayment with flooring type to ensure performance and warranty compliance.
3. Ignoring Manufacturer Instructions
Each flooring product comes with its own rules—and breaking them can void your warranty and damage the floor.
- Why It Matters: Incorrect adhesives, spacing, or tools can ruin the floor or cause long-term issues.
- Warranty Voids: If installation doesn’t follow instructions, any claims for damage may be rejected.
- Checklist:
- Review adhesive compatibility
- Understand recommended expansion gaps
- Follow layout and stagger patterns precisely
For a more comprehensive guide to choosing the right flooring, including key steps to consider before installation, take a look at Top Flooring Trends for 2025.
4. Rushing the Project Timeline
Flooring projects require time, patience, and planning. Cutting corners only leads to regret.
- Common Result: Adhesives may not cure properly; planks can shift or settle incorrectly.
- Furniture Placement: Moving furniture too soon can dent or unbalance freshly laid floors.
- Plan Ahead: Build in time for acclimation, installation, curing, and post-care before using the space.
5. Not Planning for Expansion Gaps
Floating floors expand and contract with environmental changes. Without room to move, they push against walls or buckle.
- Critical Measurement: Leave a 1/4″ expansion gap along all walls and fixed objects.
- Use Spacers: During installation, use spacers to maintain consistent gaps.
- Finishing Touch: Cover the gaps with baseboards or quarter-round trim for a polished look.
6. Using the Wrong Adhesives or Fasteners
Using the wrong adhesives or fasteners is one of the most flooring installation mistakes. Flooring adhesives and fasteners are not interchangeable. Each material has its own requirements.
- Wrong Tools, Wrong Results: Using wood glue on vinyl or nails on tile will lead to failure.
- Manufacturer’s Recommendation: Always follow the specific adhesive or fastener guide based on floor type, subfloor, and environment.
- Environmental Conditions: Humidity and temperature affect adhesive performance—check setting times and ideal conditions on the label.
Neglecting Post-Installation Care
One of the top flooring installation mistakes is neglecting the after care. The job isn’t done after laying the final plank. Immediate aftercare ensures long-term performance and beauty.
- Avoid Harsh Cleaning: Never use wet mops, steam cleaners, or abrasive chemicals right after installation.
- Furniture Rules: Use felt pads or furniture coasters to prevent dents or scratches.
- Ongoing Maintenance: Sweep or vacuum regularly, and follow a manufacturer-recommended cleaning schedule to preserve floor quality.
Ongoing Care and Damage Prevention
Maintaining and repairing your floors after installation is key to preserving their appearance, safety, and longevity. Here’s what to do:
1. Regular Cleaning Routine
- Sweep or vacuum regularly to remove dirt and debris that can cause scratches.
- Use a damp (not wet) mop with floor-specific cleaner—avoid harsh chemicals.
- For wood and laminate, avoid excess water to prevent swelling or warping.
2. Protective Measures
- Install felt pads under furniture legs to prevent scratches and dents.
- Use area rugs or mats in high-traffic areas and entryways.
- Keep pet nails trimmed to avoid surface scratches.
3. Environmental Control
- Maintain consistent indoor humidity (ideally between 35%–55%) to minimize expansion and contraction in wood or laminate floors.
- Use dehumidifiers in humid areas or during summer months, especially for hardwood floors.
4. Immediate Spill Cleanup
- Wipe up liquid spills immediately to prevent staining, warping, or mold growth—especially for wood, laminate, and carpet.
- Use a dry or lightly damp cloth instead of soaking the area.
5. Periodic Deep Cleaning
- Schedule deep cleans every few months using manufacturer-recommended products or professional services.
- Avoid steam mops unless the flooring type explicitly allows it.
6. Inspect and Repair Minor Damage Promptly
- Repair scratches or dents with manufacturer-recommended touch-up kits.
- Replace damaged planks or tiles if they’re beyond simple fixes.
- For grout or tile floors, reseal grout lines annually to prevent staining or cracking.
7. Follow Manufacturer’s Maintenance Guidelines
- Always check care instructions specific to your flooring material (vinyl, hardwood, laminate, tile, etc.).
- Following these guidelines preserves your warranty and prevents costly damage.
Why You Should Hire Professional Help
Maintaining and repairing your floors after installation is key to preserving their appearance, safety, and longevity. Here’s what to do:
1. Expertise and Experience
- Professionals have the technical know-how to tackle complex flooring installations and repairs.
- They are familiar with various flooring types (hardwood, laminate, tile, etc.) and their specific installation requirements.
- An experienced installer ensures that your flooring is level, properly spaced, and aligned, improving the final result.
2. Access to Specialized Tools and Equipment
- Flooring projects often require specialized tools (e.g., tile cutters, saws, leveling tools, or moisture meters).
- Professionals have access to these tools, which ensures that your floors are installed correctly and with precision.
3. Warranty Protection
- Many flooring manufacturers require professional installation to uphold warranty conditions.
- Hiring a licensed contractor ensures that you follow proper installation guidelines, protecting your warranty.
4. Time-Saving and Efficiency
- Professionals complete the job faster and more efficiently, allowing you to enjoy your new floors sooner.
- They can handle the logistics of a large project, including moving furniture and disposing of old flooring.
5. Long-Term Durability
- Proper installation and maintenance extend the lifespan of your floors and prevent costly repairs in the future.
- Professionals can address underlying issues such as subfloor problems or uneven surfaces.
How to Find the Right Professional for Your Flooring Project
1. Research Online Reviews and Recommendations
- Start by searching for local flooring contractors in your area.
- Check reviews on websites like Yelp, Angie’s List, or Google Reviews to find trusted professionals with good feedback.
- Ask friends, family, or neighbors who have had similar flooring work done for recommendations.
2. Verify Credentials and Licensing
- Ensure the professional you hire is licensed and insured. This protects you in case of accidents or poor workmanship.
- Ask to see their contractor’s license, insurance certificate, and any certifications for specific flooring types (e.g., hardwood installation, tile, etc.).
3. Get Multiple Quotes
- Contact at least three flooring professionals to get written estimates.
- Compare the quotes based on price, timeline, and scope of work. Make sure all costs (labor, materials, installation, etc.) are included.
- Be cautious of unusually low quotes, as they may indicate subpar materials or rushed work.
4. Ask for a Portfolio
- Request to see photos of previous projects or ask for references from past clients.
- A reputable professional should be happy to provide examples of their work and client testimonials.
5. Assess Communication and Professionalism
- Pay attention to how responsive and professional the contractor is during initial meetings and consultations.
- A good professional should be clear about what will be done, provide timelines, and be open to addressing your questions and concerns.
6. Check Manufacturer Recommendations
- If you’re installing a specific type of flooring, check with the manufacturer for a list of recommended or certified installers.
- Following the manufacturer’s recommendations ensures that your warranty remains intact.
7. Inspect the Contract
- Once you’ve selected a contractor, review the contract carefully before signing.
- Ensure that it includes the price, timeline, scope of work, payment terms, and warranty information.
- Make sure the contract specifies who is responsible for purchasing materials, moving furniture, and other project logistics.
Conclusion
New flooring can instantly elevate your home’s style and value—but only if it’s installed correctly. Avoiding these flooring installation mistakes could mean the difference between a floor that lasts 5 years and one that lasts 25!
Take your time, read the instructions, and when in doubt—consult a professional. You’ve invested in beautiful flooring; now invest the effort to install it right. Want personalized flooring advice or help finding trusted installers? Reach out to our team today and let’s make your flooring project flawless!


